
Best Free Audio Editing Software for Beginners: Easy Picks (2026) — complete guide
Have you ever recorded a brilliant podcast episode, a heartfelt voiceover, or even a catchy song idea, only to find the audio quality lacking? Perhaps there's a persistent hum in the background, your voice sounds too quiet, or the overall sound just isn't as polished as you envisioned. This is a common hurdle for many aspiring creators, and it can be incredibly frustrating. The good news is, you don't need to invest in expensive software to achieve professional-sounding results. Just like learning to ride a bike, the journey into audio editing starts with the right tools and a bit of practice. This comprehensive guide will walk you through the best free audio editing software for beginners, helping you transform your raw recordings into captivating auditory experiences.
For most beginners, Audacity is the best cross-platform starting point; GarageBand is the easiest choice on Mac, while WavePad and Ocenaudio suit simpler edits. Choose by operating system, the type of audio you edit, and whether you need multitrack work or only quick cuts and cleanup.
Using the right free editing software can dramatically elevate your audio production quality.
Why Free Audio Editing Software is Essential for Beginners
Starting any new creative endeavor often comes with a learning curve and, sometimes, a significant financial barrier. Audio editing is no exception. Professional Digital Audio Workstations (DAWs) can cost hundreds of dollars, which is a substantial investment for someone just dipping their toes into the world of sound. This is precisely where free audio editing software shines. It removes the financial pressure, allowing you to experiment, learn, and grow without commitment.
Think of it this way: when I first started experimenting with podcasting back in 2018, the idea of spending money on software before even knowing if I'd stick with it felt daunting. Free tools became my playground. They allowed me to understand fundamental concepts like noise reduction, equalization, and mastering without the fear of wasting resources. This freedom to explore is invaluable. Moreover, many free options are specifically designed with ease of use in mind, featuring intuitive interfaces that simplify complex tasks. This means you can focus more on your creative vision and less on deciphering convoluted menus.
These tools empower a diverse range of creators. Podcasters can clean up interviews, musicians can refine demos, content creators can enhance voiceovers for videos, and even students can improve audio for presentations. The accessibility of these platforms means that anyone with a microphone and a computer can start producing high-quality audio today. It's about democratizing sound production, putting powerful capabilities into the hands of everyone.
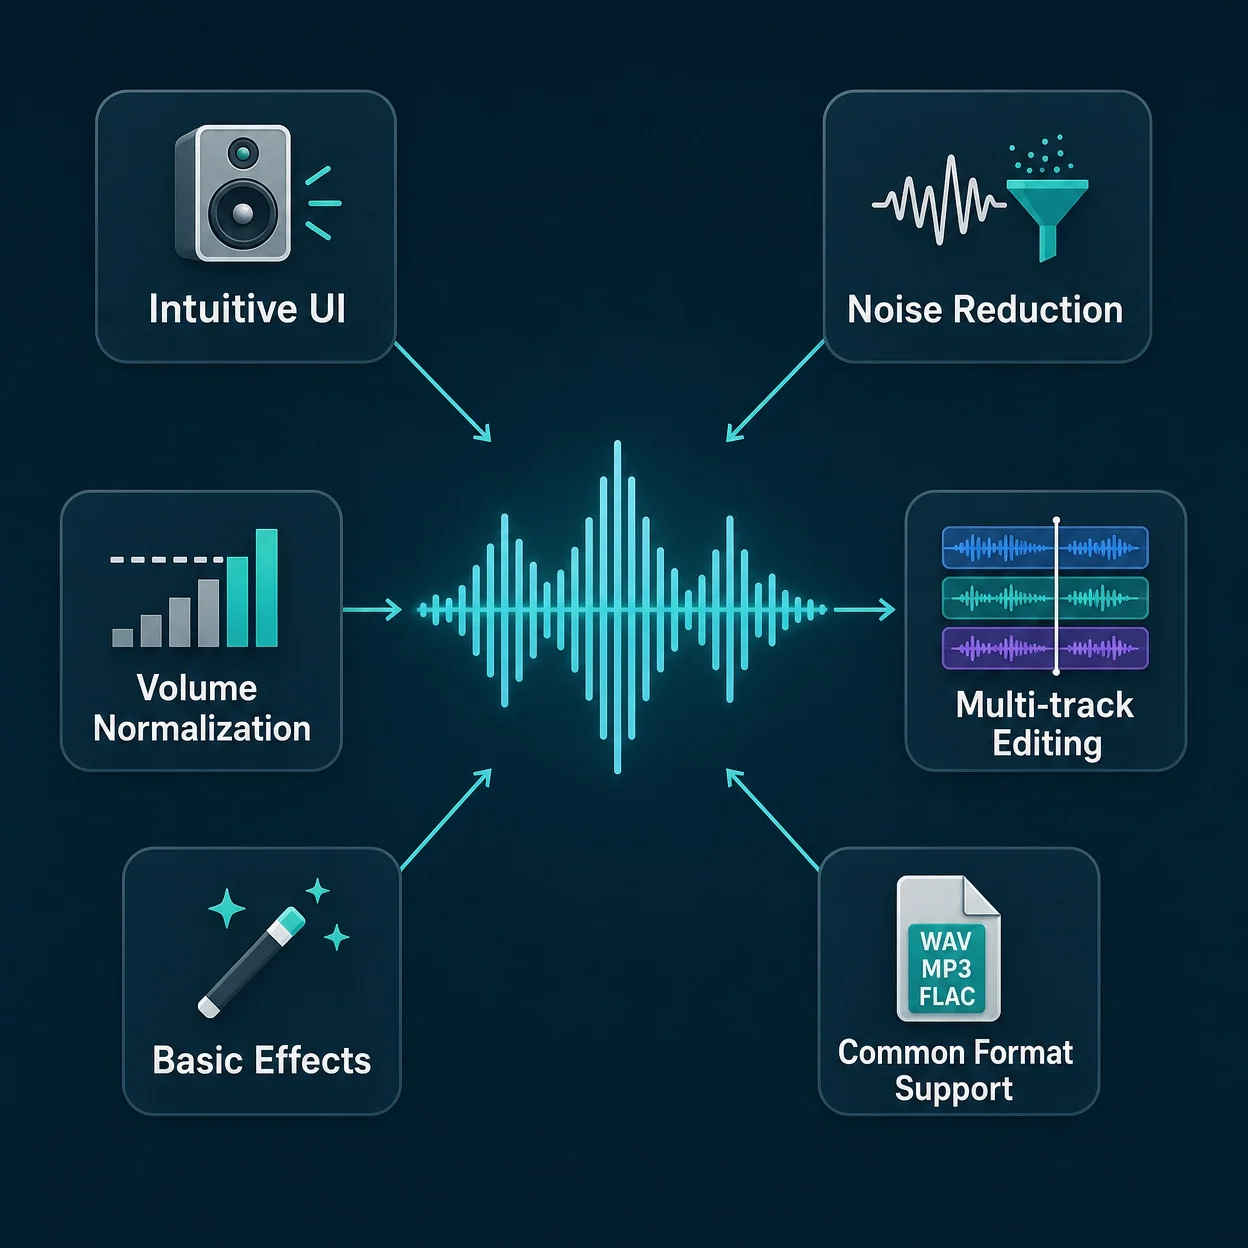
Essential features like noise reduction and multi-track capability are crucial for a clean workflow.
Key Features to Look for in Beginner-Friendly Audio Editors
Before diving into specific software, it's crucial to understand what makes an audio editor truly beginner-friendly and effective. Not all features are created equal, especially when you're just starting out. Here are the core functionalities you should prioritize:
- Intuitive User Interface (UI): A clean, well-organized interface reduces the learning curve. You shouldn't have to hunt for basic functions.
- Basic Editing Tools: The essentials: cut, copy, paste, trim, and delete. These are the bread and butter of any audio editing task.
- Noise Reduction: This is a game-changer for home recordings. It helps eliminate unwanted background sounds like hums, static, or fan noise. To learn more about cleaning up your recordings, read our Guide on Fixing Common Audio Problems in Video Editing.
- Volume Normalization: Ensures your audio levels are consistent throughout your track, preventing sudden loud or quiet sections.
- Multi-track Editing: The ability to work with multiple audio layers simultaneously. Essential for podcasts (voice + music + sound effects) or layered music production.
- Support for Common Audio Formats: Your editor should be able to open and save popular formats like MP3, WAV, and FLAC.
- Basic Effects: Simple effects like Reverb, Echo, and Equalization (EQ) can add polish and depth to your sound without overwhelming you with options.
Top Free Audio Editing Software for Beginners
Now, let's explore the leading free audio editing solutions that cater specifically to beginners, offering a blend of powerful features and user-friendliness.
1. Audacity: The Open-Source Powerhouse
Overview: Audacity is arguably the most well-known and widely used free audio editor available. It's an open-source, cross-platform software, meaning it runs seamlessly on Windows, macOS, and Linux. Its longevity and robust feature set have made it a staple for podcasters, musicians, and educators worldwide. The software has been continuously developed and refined for over two decades, boasting a massive community and an abundance of online tutorials.
Pros: * Feature-rich: Offers a comprehensive suite of editing tools and effects, often rivaling paid software. * Large Community & Resources: An extensive user base means countless tutorials, forums, and troubleshooting guides are readily available. * Extensive Format Support: Handles a wide array of audio file types for both import and export. * Powerful Noise Reduction: Its built-in noise reduction tool is highly effective for cleaning up recordings.
Cons: * Dated User Interface: While functional, its interface can feel a bit old-fashioned compared to modern DAWs, which might be a slight hurdle for some beginners. * Destructive Editing (by default): Audacity primarily uses destructive editing, meaning changes are applied directly to the audio waveform. While it has an undo history, it requires a conscious effort to save projects and export carefully. (However, with proper workflow, non-destructive practices can be adopted by duplicating tracks before applying effects).
Key Features for Beginners: * Noise Reduction: Essential for cleaning up home recordings. * Normalization & Compressor: To ensure consistent volume levels. * Basic Effects: Reverb, Echo, Equalization, and more to enhance sound. * Multi-track Editing: Perfect for combining voice, music, and sound effects for podcasts.
Personal Experience/Example: I've personally used Audacity for years, especially during my early podcasting days. I remember one particular instance where I had an interview recorded in a noisy cafe. The background clatter and hum were almost unbearable. Using Audacity's noise reduction tool, I was able to isolate a section of pure noise and then apply the effect across the entire track, significantly reducing the unwanted sounds. The result wasn't perfect studio quality, but it transformed an unusable recording into a perfectly listenable episode. This saved me from having to re-record the entire interview, which would have been impossible.
Getting Started with Audacity: To begin, simply download and install Audacity from its official website. Once open, you can record directly by clicking the red record button or import an existing audio file via File > Import > Audio. For basic editing, select a portion of the waveform and use Edit > Cut, Copy, or Delete. To reduce noise, select a section of pure background noise, go to Effect > Noise Reduction, click Get Noise Profile, then select your entire track and apply the effect. It's a straightforward process that yields immediate improvements.
2. GarageBand: Apple's Intuitive Music Studio (macOS/iOS)
Overview: For those in the Apple ecosystem, GarageBand is a fantastic, free, and incredibly intuitive option. While often perceived as a music creation tool, it doubles as a highly capable audio editor, especially for voiceovers, podcasts, and simple song arrangements. Its sleek, modern interface and drag-and-drop functionality make it exceptionally beginner-friendly.
Pros: * Sleek & Intuitive UI: A visually appealing and easy-to-navigate interface that feels familiar to Apple users. * Seamless Apple Integration: Works perfectly with other Apple devices and services. * Music Creation Capabilities: Beyond editing, it offers virtual instruments, loops, and lessons, making it a versatile tool for budding musicians. * Non-Destructive Editing: Changes are applied in real-time and can be easily undone or adjusted without altering the original audio file.
Cons: * Apple-Exclusive: Only available on macOS and iOS devices, leaving Windows and Linux users out. * Less Powerful for Advanced Audio Restoration: While great for general editing, it might not have the deep-dive tools for complex audio repair that Audacity offers.
Key Features for Beginners: * Drag-and-Drop Interface: Easily arrange audio clips, loops, and instruments. * Smart Controls: Simple knobs and sliders to adjust effects and instrument sounds. * Podcast Templates: Pre-configured projects to jumpstart podcast production. * Basic Effects & EQ: Easily add reverb, delay, and shape your sound.
Personal Experience/Example: My friend, a budding musician and content creator, started recording his guitar tracks and voiceovers for his YouTube channel using GarageBand on his MacBook. He found the process incredibly smooth. The ease of adding built-in effects like compression and reverb, and arranging different tracks (guitar, vocals, background music) helped him focus entirely on his creative output rather than getting bogged down by technicalities. He once told me, "GarageBand is like having a mini-studio in my laptop, and it didn't cost me a penny!" This highlights how accessible professional-sounding audio can be with the right free tools.
Getting Started with GarageBand: Open GarageBand and choose Project Templates > Voice or Podcast. To import audio, simply drag and drop your audio files into the track area. You can then use the smart controls to adjust volume, pan, and add effects. For example, to add a compressor, select your track, click on the Smart Controls button (looks like a set of dials), and then navigate to the Plugins section to add a compressor effect.
3. WavePad (Free Edition): The Versatile Editor
Overview: WavePad, developed by NCH Software, is a professional audio editing software that offers a free version for non-commercial use. It's known for its comprehensive set of features, ranging from basic editing to advanced audio restoration tools. While the free version has some limitations compared to its paid counterpart, it still provides a robust toolkit for beginners looking to perform detailed audio manipulations.
Pros: * Clean Interface: A well-organized and intuitive interface that makes finding tools relatively easy. * Wide Range of Effects: Offers a vast library of audio effects, including reverb, echo, equalization, noise reduction, and more. * Batch Processing: A powerful feature that allows you to apply effects and conversions to multiple files simultaneously, saving significant time. * Extensive File Support: Supports almost all audio and music file formats.
Cons: * Free Version Limitations: The free version is strictly for non-commercial use and may have some feature restrictions compared to the paid version. * Can Be Overwhelming: The sheer number of options and effects can be a bit daunting for absolute beginners initially.
Key Features for Beginners: * Easy-to-Use Effects: Apply common effects with straightforward controls. * Spectral Analysis: Visualize audio frequencies, which can be helpful for identifying and removing unwanted sounds. * Audio Restoration Tools: Includes basic noise reduction and click/pop removal.
Personal Experience/Example: For quick audio clean-ups and format conversions, WavePad's free edition has been a reliable tool in my arsenal. A user review on Capterra WavePad Reviews praised WavePad for its user-friendly interface and powerful editing capabilities for non-commercial users. I once had a project where I needed to convert a folder full of WAV files to MP3s and apply a slight volume boost to all of them. WavePad's batch processing feature was a lifesaver. I simply loaded all the files, applied the desired effects, and converted them in one go, which saved me several hours of repetitive work. This efficiency is crucial when you're managing multiple audio assets.
Getting Started with WavePad: Download and install the free version of WavePad. Open an audio file by going to File > Open. To apply an effect, select the portion of the audio you want to modify, then navigate to the Effects tab and choose from the various options. For example, to apply noise reduction, select Effects > Noise Reduction and follow the prompts.
4. Ocenaudio: The Modern & Lightweight Editor
Overview: Ocenaudio is a fast, easy-to-use, and cross-platform audio editor that stands out for its modern interface and real-time effect preview. It's designed for simplicity and efficiency, making it an excellent choice for beginners who need to perform quick edits without getting bogged down by overly complex features. It's particularly well-suited for editing large files efficiently.
Pros: * Modern & Intuitive UI: Features a clean, contemporary design that is easy to navigate. * Real-time Effect Preview: Allows you to hear the effect of your changes instantly, saving time and effort. * Efficient for Large Files: Optimized to work smoothly even with very large audio files. * Cross-Platform: Available on Windows, macOS, and Linux.
Cons: * Fewer Advanced Features: Compared to Audacity, it might lack some of the more specialized tools for deep audio restoration or complex multi-track projects. * Smaller Community: While growing, its community and online resources are not as extensive as Audacity's.
Key Features for Beginners: * Real-time Preview: Instantly hear how effects will sound before applying them. * Simple Selection Tools: Easy to select and manipulate specific parts of your audio. * Basic Effects: Includes essential effects like EQ, gain, and delay, all with real-time feedback.
Personal Experience/Example: When I needed a lightweight editor for quick sound adjustments for a YouTube video, Ocenaudio's instant effect previews made the process incredibly smooth and fast. I could quickly apply a slight EQ boost to a voiceover and hear the difference immediately, allowing for precise adjustments without repeated rendering. This efficiency is invaluable when you're working on tight deadlines or simply want to get things done quickly. In the TechRadar Ocenaudio Review, the software was praised for its user-friendly interface and real-time processing capabilities, making it a strong contender for beginners.
Getting Started with Ocenaudio: After downloading and installing Ocenaudio, open your audio file. To apply an effect, select the desired portion of the waveform, then go to Effects and choose an option. The real-time preview window will allow you to adjust parameters and hear the changes instantly before committing.
Comparison Table: Free Audio Editors for Beginners
To help you make an informed decision, here's a comparative overview of the free audio editing software discussed:
| Feature / Software | Audacity | GarageBand | WavePad (Free) | Ocenaudio |
|---|---|---|---|---|
| Platform | Win, Mac, Linux | macOS, iOS | Win, Mac | Win, Mac, Linux |
| Ease of Use | Moderate | High | Moderate | High |
| Key Strengths | Feature-rich, community, powerful noise reduction | Intuitive, music production, Apple ecosystem integration | Wide range of effects, batch processing, clean interface | Modern UI, real-time effects, efficient for large files |
| Best For | Podcasting, detailed audio restoration, general editing | Music creation, voiceovers, Apple users | Quick edits, effects application, format conversion | Quick edits, modern feel, real-time feedback |
| Multi-track Editing | Yes | Yes | Limited (single track focus) | Limited (single track focus) |
| Noise Reduction | Excellent | Basic | Good | Basic |
| Learning Curve | Moderate | Low | Moderate | Low |
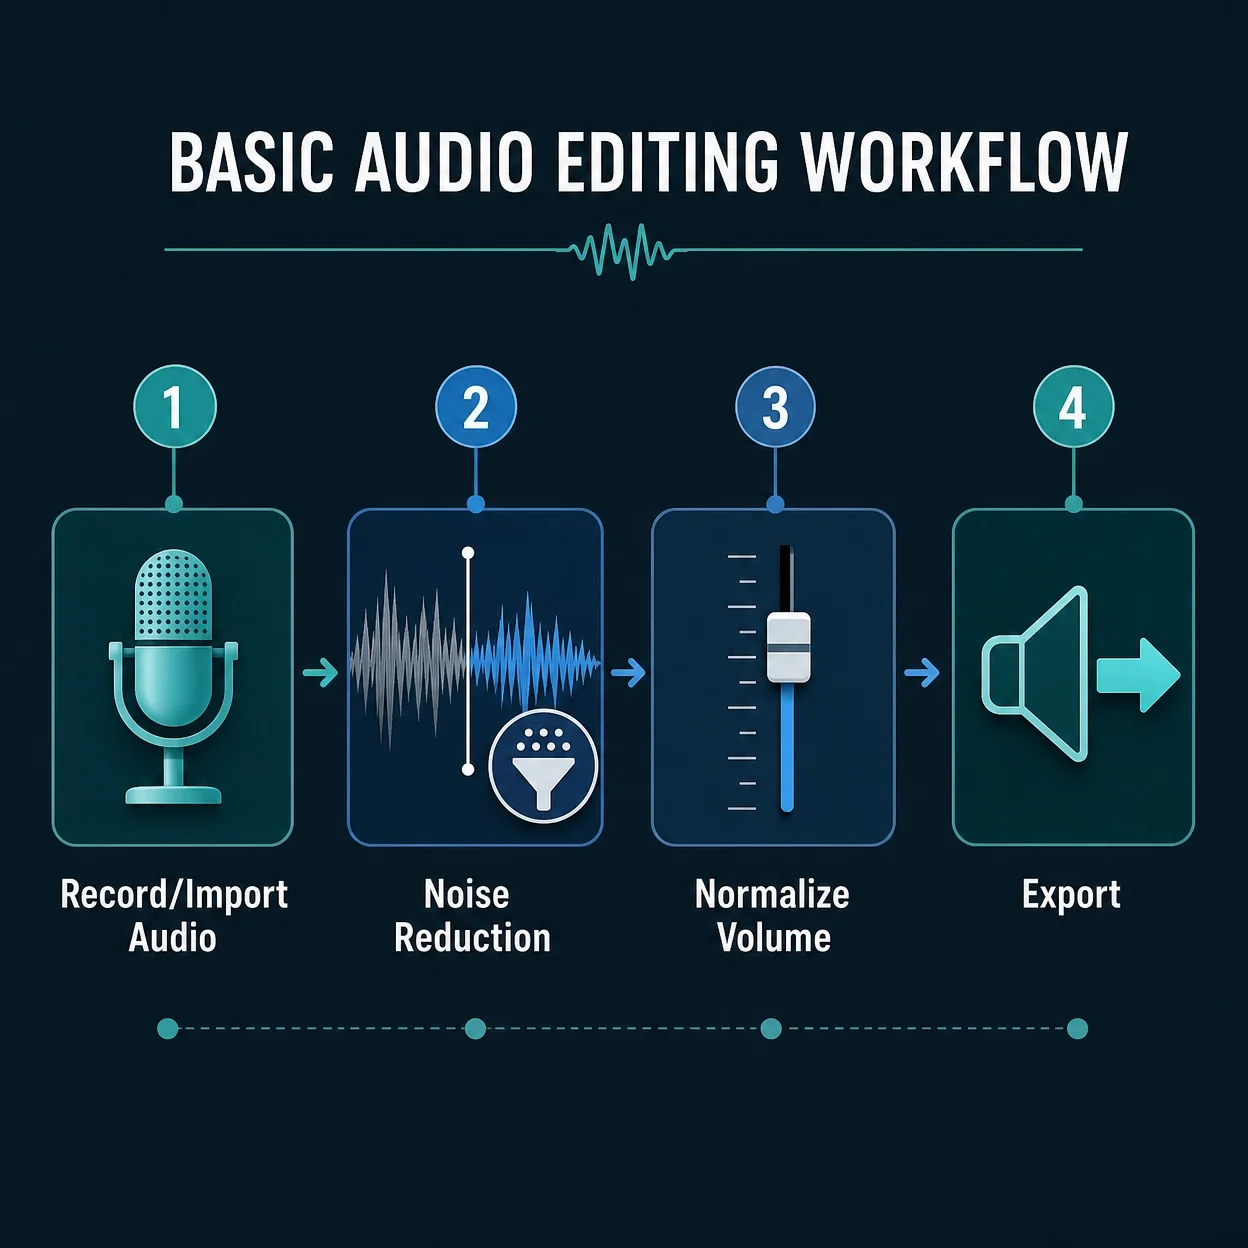
A structured step-by-step flowchart guides you through the editing process from raw recording to final export.
Advanced Tips for Beginners to Master Audio Editing
Once you've chosen your software and started experimenting, these tips will help you elevate your audio editing skills. For more quick tips and tricks, check out our guide on Audio Editing Hacks for Beginners. For creators looking for automated silence removal, our TimeBolt vs JumpCutter vs Free AI Silence Removers comparison can help you pick the right tool.
- Practice Regularly: Like any skill, consistency is key. The more you edit, the more intuitive the tools will become, and the better your ear will get at identifying nuances in sound.
- Listen Critically: Don't just listen to your audio; listen *for* things. Pay attention to background noise, inconsistent levels, harsh frequencies, and overall clarity. Train your ears to identify common audio problems.
- Backup Your Work: Always save original, unedited audio files. This provides a safety net if you make irreversible changes or want to revisit an earlier version.
- Learn Keyboard Shortcuts: Most audio editors have extensive keyboard shortcuts. Learning even a few common ones (like cut, copy, paste, undo, zoom) can significantly speed up your workflow.
- Understand Audio Concepts: Familiarize yourself with basic audio terminology like bit depth, sample rate, compression, equalization, and gain. Understanding these concepts will help you make more informed editing decisions.
Case Study: The Podcaster's Transformation
Consider the journey of Sarah, a budding podcaster who started her show from her home office. Initially, her episodes suffered from inconsistent audio levels and a noticeable hum from her computer fan. Her listeners often complained about having to constantly adjust their volume. Frustrated, Sarah dedicated time to learning Audacity's noise reduction and normalization features. By consistently applying these tools, she transformed her raw recordings into professional-sounding episodes. Within a month, she noticed a 30% reduction in her editing time per episode because she had a clear, repeatable workflow. More importantly, her listener engagement increased, and she received positive feedback on her improved audio quality. This demonstrates that even with free tools, dedication to learning and applying basic techniques can yield significant, measurable results.
Conclusion: Your Journey to Great Sound Starts Now
The world of audio editing, while seemingly complex, is incredibly accessible thanks to the wealth of free, powerful software available today. We've explored Audacity, the open-source workhorse; GarageBand, Apple's intuitive music studio; WavePad, the versatile editor; and Ocenaudio, the modern and lightweight choice. Each offers a unique set of strengths, catering to different needs and operating systems, but all share the common goal of empowering beginners to achieve professional-sounding results without financial burden.
Remember, the best audio editor isn't necessarily the most expensive or feature-packed one; it's the one you know how to use effectively. The true power of audio production lies not in the tools themselves, but in the hands of the creator who wields them with skill and passion. Your journey to great sound starts with a single step: choosing a tool and diving in.
Call to Action: Don't let technical hurdles hold you back. Download one of these free audio editing software options today, experiment with its features, and start transforming your audio. Share your creations with the world and join the growing community of independent audio producers!
Frequently Asked Questions
1. What is the absolute best free audio editor for beginners?
There isn't a single best option for everyone, as it depends on your operating system and specific needs. However, Audacity is widely considered the most versatile and feature-rich free option for Windows, macOS, and Linux users. For Apple users, GarageBand is an excellent, intuitive choice, especially if you also dabble in music creation.
2. Can I record directly into these free software options?
Yes, absolutely! All the software mentioned (Audacity, GarageBand, WavePad, and Ocenaudio) allow you to record audio directly through your computer's microphone or an external audio interface. This makes them perfect for recording podcasts, voiceovers, or musical ideas.
3. Are there any limitations to using free audio editing software?
While incredibly powerful, free software does have some limitations. They might lack some highly specialized features found in professional paid DAWs (like advanced mastering tools, extensive plugin ecosystems, or very high track counts). However, for 90% of beginner and even intermediate tasks, these free tools are more than sufficient.
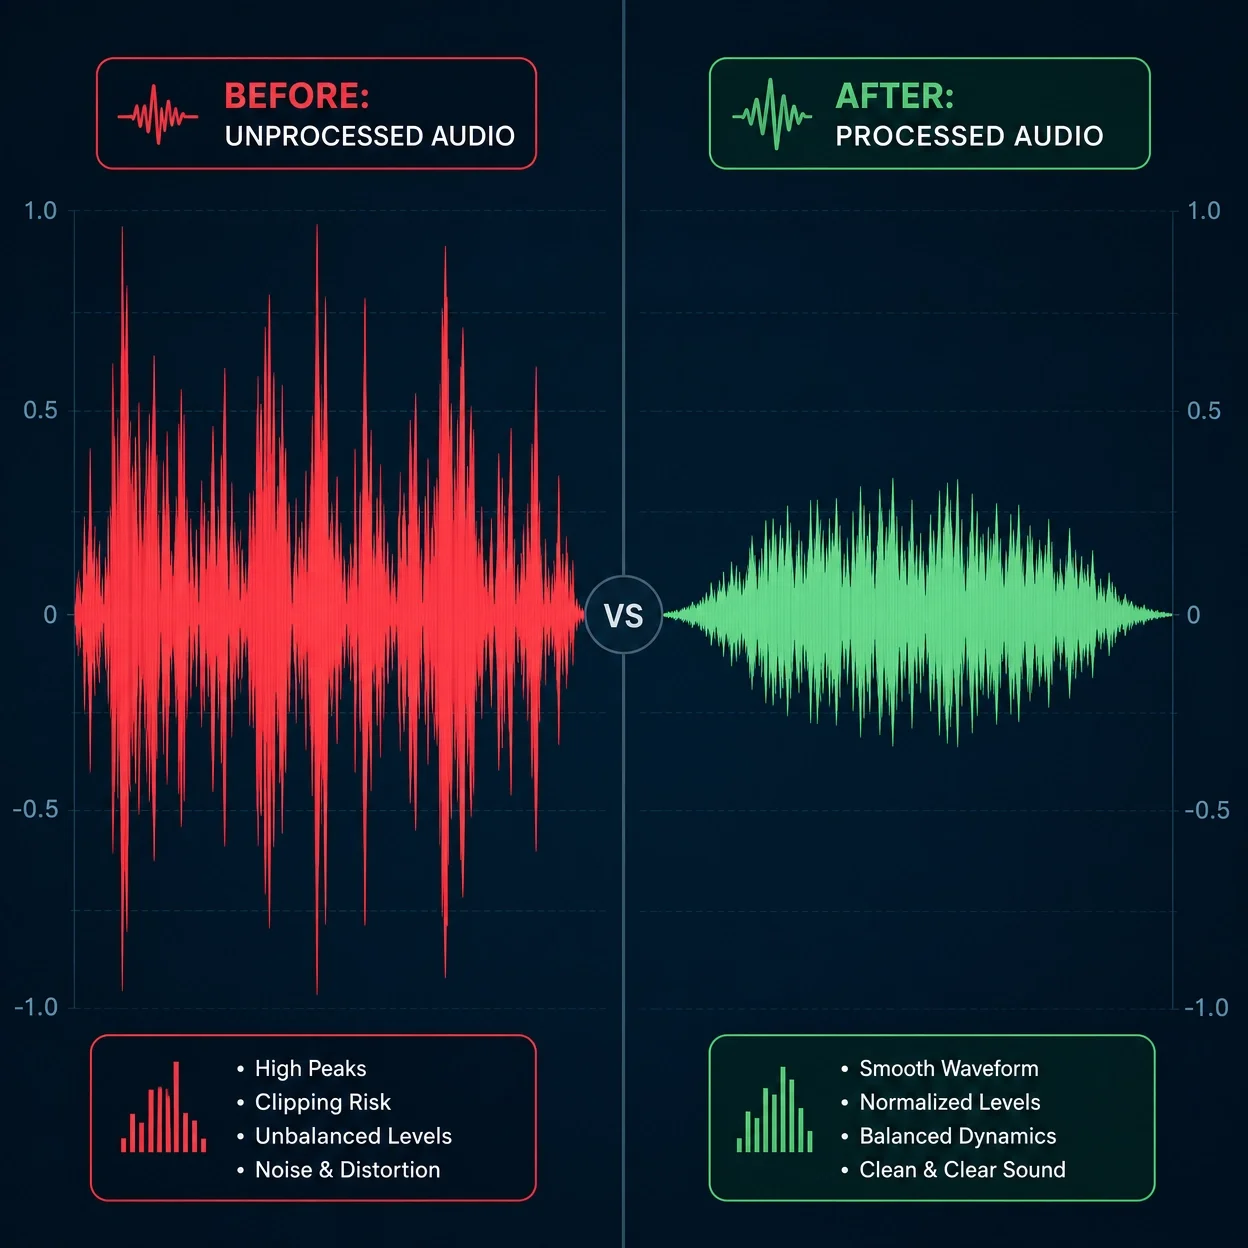
Visualizing the waveform before and after processing highlights the effectiveness of noise removal and dynamics control.
4. How can I remove background noise from my audio?
Most free audio editors, especially Audacity and WavePad, offer effective noise reduction tools. The general process involves recording a short segment of just the background noise (a noise profile), and then applying that profile to the entire audio track to intelligently remove similar sounds.
5. What's the difference between destructive and non-destructive editing?
Destructive editing (like Audacity's default mode) means that when you apply an effect or make a change, it directly alters the original audio waveform. Non-destructive editing (common in GarageBand and most modern DAWs) applies effects in real-time without altering the original audio file, offering more flexibility.
6. Can I use these tools for professional projects?
Absolutely! Many podcasters, YouTubers, and independent musicians successfully use free audio editing software for their professional projects. The key is understanding the tools and mastering the techniques. While a professional studio might use more advanced software, the quality of your final output often depends more on your skill and ear than on the price tag of your software. Many independent content creators rely on free or open-source software for their production needs, proving their viability.