How to Process Audio for "Faceless" Gaming Commentaries
Guide #21 | Author: M Zeshan | Category: Audio Processing | Published: 2026-05-25
In the highly competitive world of YouTube gaming, content is king. But if you are running a "faceless" gaming channel, your voice is your only identity. Without a webcam to distract your audience, every single audio imperfection becomes magnified. The sharp clack of a mechanical keyboard, the hum of your PC fans, or the echo of game audio bleeding into your microphone can instantly ruin the viewer's immersion. For a faceless creator, poor audio quality is the fastest way to lose subscribers and trigger YouTube's retention drop-off metrics.
Many new creators believe that buying an expensive microphone will magically solve all their audio problems. However, the reality is much more complex. Even a $400 microphone will pick up the frantic clicking of Cherry MX Blue switches if your setup and processing are flawed. The secret to that buttery-smooth, professional commentary you hear from top YouTubers isn't just about the gear; it is about the entire audio processing workflow.
In this comprehensive guide, we will dive deep into the specific challenges faced by faceless gaming commentators. We will explore practical, actionable strategies to eliminate mic bleed, silence keyboard clicks, and process your audio to achieve a rich, authoritative broadcast quality. Whether you are a beginner looking to improve your first Let's Play or an experienced creator wanting to streamline your workflow, this guide will provide you with the tools and techniques you need to succeed in 2026.
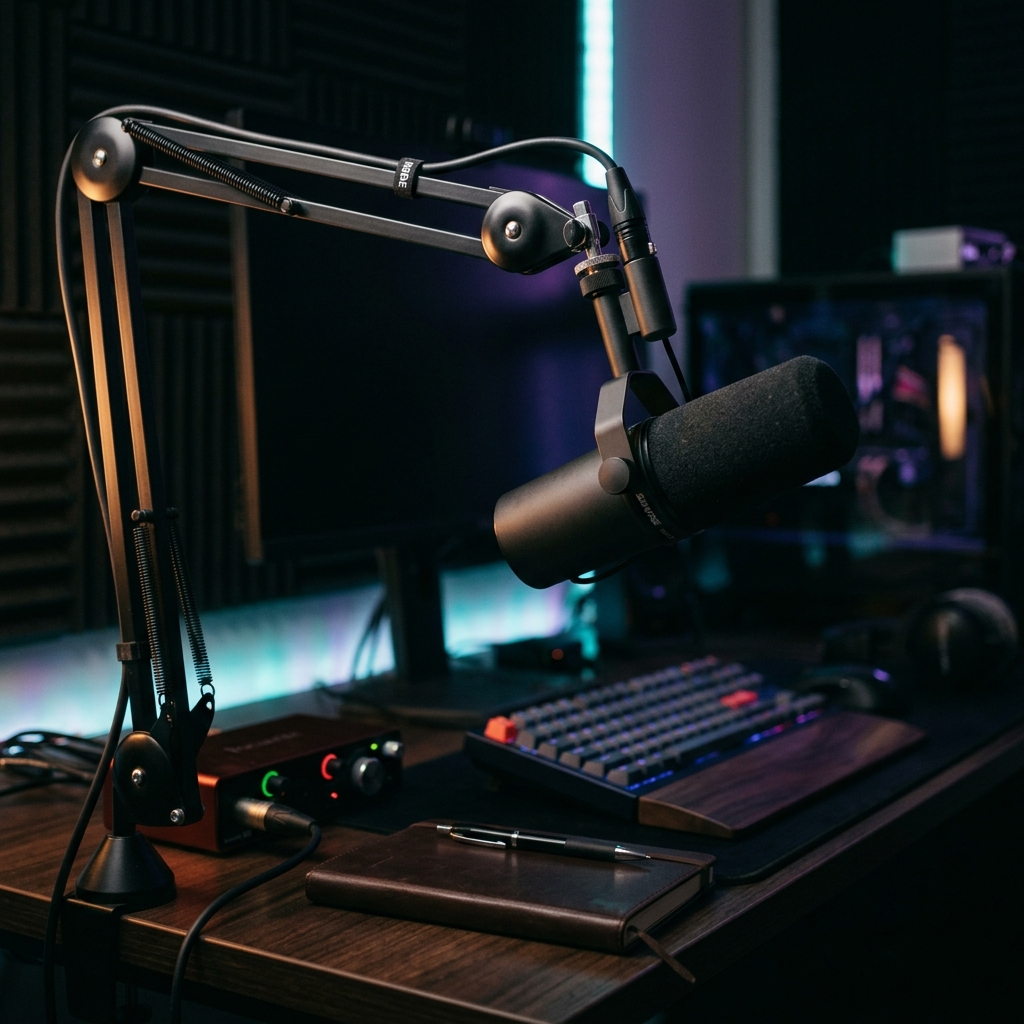
A proper microphone setup is the first line of defense against unwanted background noise.
Understanding the Enemies of Clean Audio
Before we can fix the problems, we need to understand what causes them. In a typical gaming setup, several factors conspire to ruin your commentary track.
The Menace of Keyboard Clicks
Mechanical keyboards are beloved by gamers for their tactile feedback and responsiveness. However, the very switches that make them great for gaming make them a nightmare for audio recording. The sharp, high-frequency transient sound of a key bottoming out cuts through most standard noise gates. Because the keyboard is usually positioned directly between you and the monitor, it is often very close to the microphone, making it incredibly difficult to isolate your voice from the clicking.
The Frustration of Mic Bleed
Mic bleed occurs when your microphone picks up sounds that it shouldn't. In a gaming context, this usually means the game audio from your speakers or headphones is leaking into your microphone. This creates a distracting echo effect and makes it impossible to cleanly edit your commentary later. If you need to cut a section of your voice, you will also be cutting the game audio, leading to jarring jumps in the background sound.
The Constant Hum of Background Noise
Gaming PCs generate heat, and cooling them requires fans. The constant whir of PC fans, combined with air conditioning, street noise, or even the hum of a refrigerator, creates a persistent noise floor. While this might seem minor, it becomes incredibly fatiguing for the listener over a 20-minute video. In 2026, with AI-driven audio analysis, listeners are more sensitive than ever to unnatural noise suppression artifacts, making clean capture essential.
Step 1: The Hardware Foundation
The best way to process audio is to capture it cleanly in the first place. No amount of software magic can completely fix a terrible recording. Your hardware setup is your first line of defense.
Choosing the Right Microphone: Dynamic vs. Condenser
The most common mistake new creators make is buying a condenser microphone for an untreated room. Condenser microphones are incredibly sensitive; they are designed for soundproof vocal booths and will pick up every single sound in your room, including the dog barking down the street and the click of your mouse.
For a gaming setup, a Dynamic Microphone is almost always the better choice. Dynamic mics are less sensitive and excel at rejecting off-axis noise (sounds coming from the sides or back). They require you to be very close to the capsule, which naturally increases the volume of your voice relative to the background noise. Popular choices include the Shure SM7B, the Rode PodMic, or the Samson Q2U.
Mastering Microphone Placement
Even the best dynamic microphone will pick up keyboard clicks if it is placed incorrectly. The goal is to maximize the distance between the mic and the keyboard while minimizing the distance between the mic and your mouth.
- Use a Boom Arm: Never use the desk stand that comes with your microphone. It will transmit every bump and vibration directly into the mic. A boom arm allows you to position the microphone exactly where you need it.
- The Rule of Proximity: Position the microphone 2 to 4 inches from your mouth. This dramatically increases the signal-to-noise ratio.
- Angle the Null Point: Every microphone has a "null point"—the area where it is least sensitive to sound. For a cardioid microphone, this is directly behind it. Angle your microphone so that the back of it is pointing directly at your keyboard.
- Add a Shock Mount & Pop Filter: A shock mount isolates mechanical vibrations from your desk, while a pop filter prevents plosive bursts from overloading the diaphragm.
Positioning the microphone's null point towards the keyboard significantly reduces click pickup.
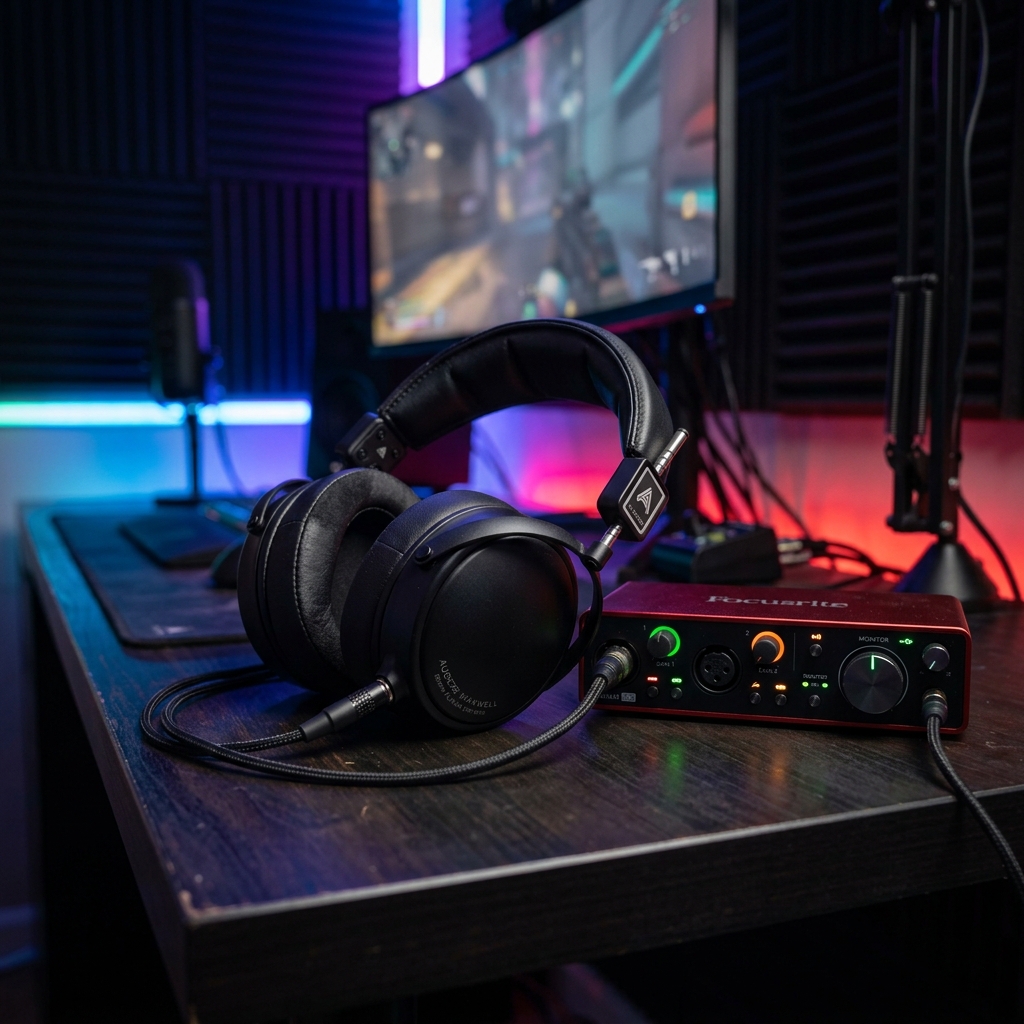
Eliminating Mic Bleed at the Source
The solution to mic bleed from game audio is simple but non-negotiable: You must use closed-back headphones. Open-back headphones leak sound by design, and speakers are out of the question if you want clean commentary. Ensure your headphones have a tight seal around your ears to prevent any game audio from escaping and reaching the microphone.
Step 2: Software Processing and Noise Reduction
Once you have optimized your hardware setup, you will still likely have some residual noise. This is where software processing comes in. The goal here is to clean the audio without making your voice sound robotic or degraded.
Traditional Noise Gates
A noise gate is a fundamental tool in audio editing. It works by muting the audio signal when it drops below a certain volume threshold. When you speak, the gate opens, letting the sound through. When you stop speaking, the gate closes, silencing the background hum.
However, noise gates have limitations. If you set the threshold too high, it will cut off the beginnings and ends of your words. More importantly, a noise gate does not remove noise while you are speaking. If you press a keyboard key while talking, the gate will be open, and the click will be recorded.
The Power of AI Noise Removal
In 2026, Artificial Intelligence has revolutionized audio processing. AI noise removal tools do not just rely on volume thresholds; they are trained on vast datasets to distinguish between human speech and unwanted noise.
Tools like NVIDIA Broadcast (if you have an RTX graphics card) can filter out keyboard clicks and background noise in real-time. However, for post-production, dedicated AI audio enhancers offer superior quality. These tools analyze your audio file and intelligently separate your voice from the background noise, even if the noise occurs simultaneously with your speech.
When using AI noise removal, the key is moderation. Applying 100% noise reduction can sometimes introduce digital artifacts, making your voice sound like it is underwater. It is often better to apply 70-80% reduction to maintain a natural tone while eliminating the most distracting noises.
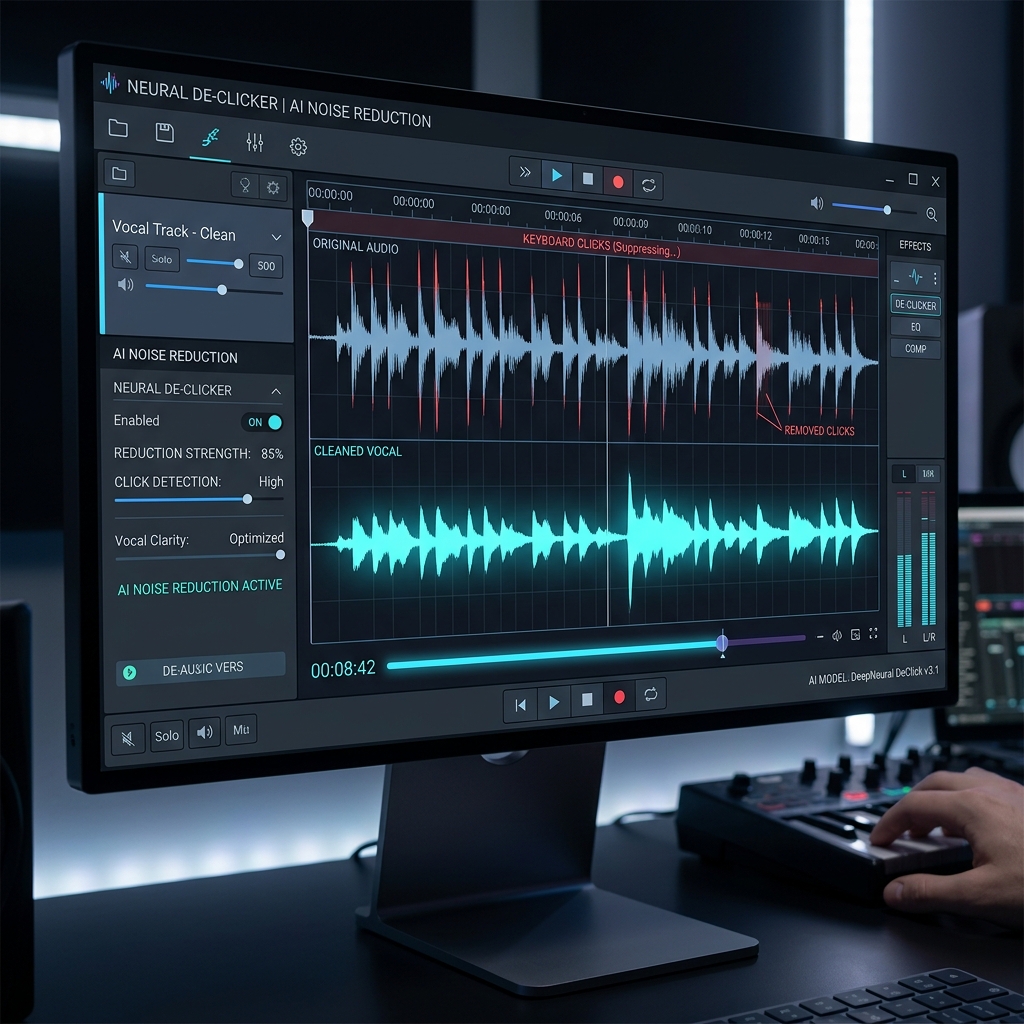
Modern AI tools allow for precise control over noise reduction without sacrificing voice quality.
Dealing with Plosives and Sibilance
Even with a pop filter, you might occasionally record harsh "P" or "B" sounds (plosives) or piercing "S" sounds (sibilance).
- De-Essers: A De-Esser is a specific type of compressor that targets high-frequency sibilance. It automatically reduces the volume only when those harsh "S" sounds occur.
- High-Pass Filters (EQ): Plosives contain a lot of low-frequency energy. Applying a High-Pass Filter (or Low-Cut Filter) around 80Hz to 100Hz will remove this low-end rumble without affecting the core tone of your voice.
Step 3: The "Deep & Authoritative" Voice Processing Chain
Faceless creators often rely on a strong, authoritative voice to command attention. While you cannot completely change your natural voice, you can enhance it significantly using Equalization (EQ) and Compression.
Equalization (EQ): Shaping Your Tone
EQ allows you to boost or cut specific frequencies in your voice. A typical EQ curve for gaming commentary involves:
- The Low-Cut: As mentioned, cut everything below 80Hz to remove rumble.
- The "Radio" Boost: To get that deep, podcast-style warmth, add a gentle boost (2-3 dB) around 100Hz to 150Hz. Be careful not to overdo this, or your voice will sound muddy.
- The Clarity Cut: Sometimes, voices can sound "boxy" or "honky." A slight cut around 300Hz to 500Hz can clear this up.
- The Presence Boost: To ensure your voice cuts through the game audio, add a slight boost around 3kHz to 5kHz. This adds clarity and presence.
Compression: Achieving Consistent Volume
When you are gaming, your volume fluctuates wildly. You might whisper during a tense stealth section and scream during a jumpscare. If you don't control these dynamics, your viewers will be constantly adjusting their volume.
A compressor automatically reduces the volume of the loudest parts of your audio, bringing them closer to the quietest parts. This allows you to raise the overall volume of the track without clipping or distorting.
- Ratio: A ratio of 3:1 or 4:1 is usually sufficient for voiceovers.
- Threshold: Set the threshold so that the compressor only engages during the louder parts of your speech.
- Attack and Release: A fast attack (around 2-5ms) will catch sudden shouts, while a moderate release (around 100-200ms) ensures the volume returns to normal smoothly.
- Make-up Gain: After compression, apply 3-5 dB of make-up gain to restore perceived loudness.
Step 4: The Ultimate Time-Saver: Silence Removal
For a faceless gaming channel, pacing is everything. Dead air—those moments where you are concentrating on the game and not speaking—kills viewer retention. Manually editing out every pause in a 2-hour recording session is soul-crushing work.
This is where automated silence removal becomes your most valuable asset. Instead of spending hours cutting clips, you can use tools to automatically detect and remove dead air.
Why Browser-Based Processing is the Future
While traditional DAWs (Digital Audio Workstations) like Premiere Pro or Audacity offer silence removal features, they often require complex setups or expensive plugins. In 2026, the trend is shifting towards efficient, browser-based solutions.
Using a dedicated browser tool for silence removal offers several advantages:
- Speed: You don't need to load a heavy video file into an editor just to process the audio.
- Accessibility: You can process your audio from any device, even a Chromebook, without installing software.
- Privacy: The best modern tools process the audio locally in your browser. This means your large, unedited files are not uploaded to a remote server, saving you massive amounts of bandwidth and ensuring your content remains private until you are ready to publish.
When using a silence remover, pay attention to the "padding" settings. You don't want the audio to cut off the exact millisecond you stop speaking, as this sounds unnatural. Adding 200ms to 300ms of padding before and after each clip ensures the edits sound smooth and conversational.
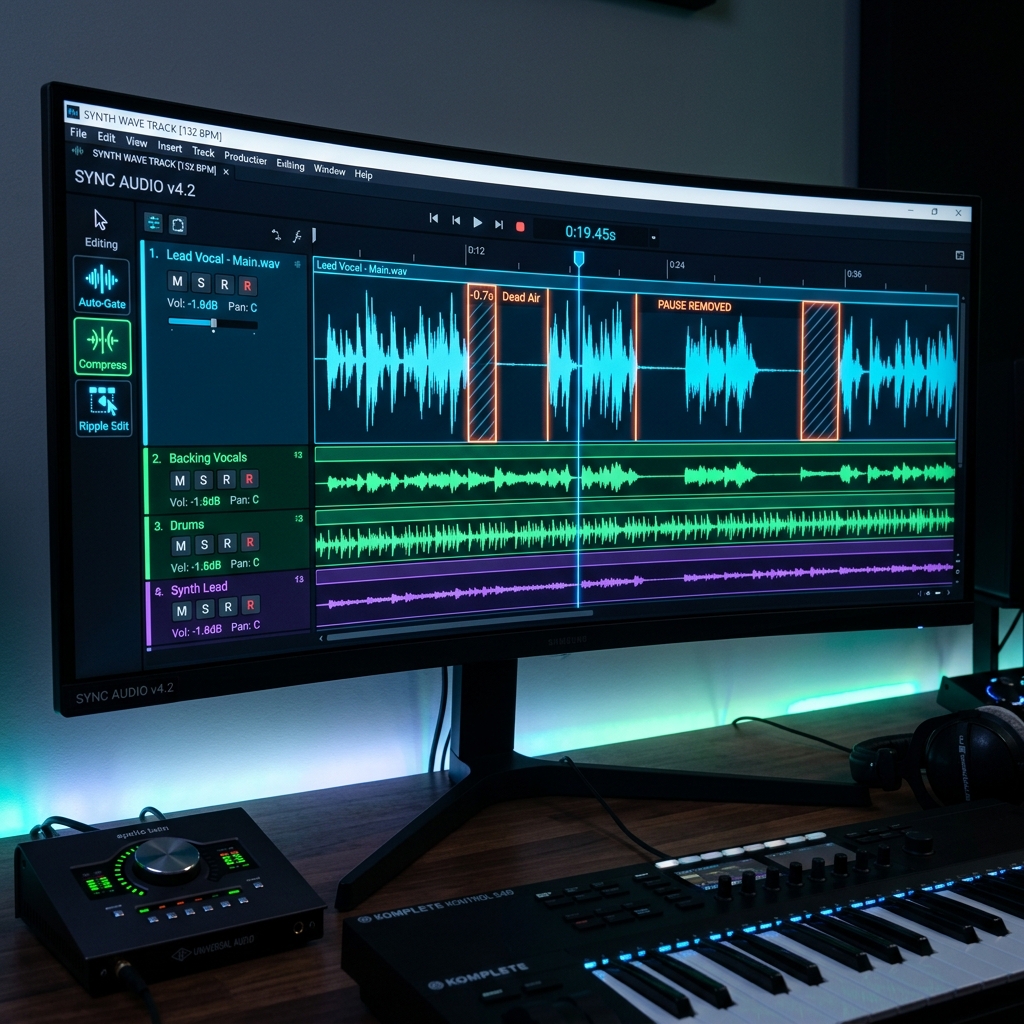
Automated silence removal transforms a messy, pause-filled recording into a tight, engaging commentary track.
Step 5: Final Polish and Loudness Normalization
The final step before marrying your audio back to your gameplay video is normalization. This ensures your video meets the loudness standards of platforms like YouTube.
YouTube normalizes audio to -14 LUFS (Loudness Units relative to Full Scale). If your audio is quieter than this, viewers will have to turn up their volume. If it is louder, YouTube will automatically turn it down, which can sometimes affect the dynamic range.
Use a loudness meter in your editing software to check your final mix. Your commentary should sit comfortably above the game audio, and the overall mix should hover around the -14 LUFS mark. Always set your True Peak limiter to -1 dBTP to prevent inter-sample clipping during platform re-encoding.
🛠Quick Pre-Publish Audio Checklist
| Task | Status | Tool/Setting |
|---|---|---|
| Low-cut filter applied | Applied | 80Hz High-Pass |
| AI noise reduction | Optimal | 70-80% strength |
| Compression ratio | Set | 3:1 or 4:1 |
| Sibilance controlled | Fixed | De-Esser at 6-8kHz |
| Loudness normalized | Complete | -14 LUFS integrated |
| True Peak limit | Safe | -1 dBTP |
| Silence padding | Balanced | 250ms before/after |
🔠Troubleshooting Common Audio Issues
| Problem | Likely Cause | Fix |
|---|---|---|
| Voice sounds "robotic" or "watery" | AI noise reduction set too high | Reduce to 60-70%, add light reverb if needed |
| Clicks still audible while talking | Noise gate threshold too low / mic too close to keyboard | Angle null point away, use dynamic mic, increase threshold slightly |
| Audio feels "thin" or lacks presence | Missing mid/high EQ boost | Add +2dB at 3-5kHz, check room reflections |
| YouTube auto-lowers volume after upload | Mastered louder than -14 LUFS | Use loudness meter, export at -14 LUFS integrated |
Conclusion
Creating high-quality audio for a faceless gaming channel requires a combination of the right hardware, smart placement, and effective software processing. By investing in a dynamic microphone, utilizing AI noise reduction to eliminate keyboard clicks, and mastering EQ and compression, you can achieve a professional, authoritative sound.
Furthermore, optimizing your workflow with automated silence removal tools will save you countless hours of tedious editing, allowing you to focus on what really matters: creating engaging content and growing your channel. Remember, in the world of faceless content, your voice is your brand. Make sure it sounds its best.
👉 Need to streamline your editing pipeline? If you are looking for a fast, secure, and efficient way to process your audio and remove dead air without the hassle of complex software, check out AudioForge Pro's Silence Remover Tool. It is designed specifically to streamline the workflow for creators who demand high quality without the steep learning curve.
Transparent Disclosure: The author is the Founder of Audio Forge Pro. Recommendations reflect genuine relevance to this topic. Core audio processing is free with no login required.
Master Your Sound Today
Join the new era of content creation. Pro-grade AI audio tools. Free to start. No signup needed.
Launch Audio Forge Pro — FREE